Irresistible No-Knead Roasted Garlic Rosemary Bread
Welcome to my kitchen! Today, I’m thrilled to share a recipe that’s not just a feast for your taste buds, but also a celebration of simplicity: No-Knead Roasted Garlic Rosemary Bread. Imagine walking into a cozy home filled with the warm, inviting aroma of freshly baked bread, mingling with the earthy scent of roasted garlic and the vibrant notes of rosemary. It’s the kind of smell that wraps around you like a soft blanket, coaxing you to gather around the table with loved ones.
This recipe is close to my heart because it embodies everything I believe about cooking. It’s straightforward, requires minimal equipment, and allows you to create something truly special with just a handful of ingredients. Whether you’re a beginner just learning your way around the kitchen or a seasoned cook looking to impress, this bread will fill your home with warmth and joy. Let’s dive into the magic of baking together!
Why You’ll Love This Recipe
Effortless Preparation
One of the best things about this No-Knead Roasted Garlic Rosemary Bread is how effortlessly it comes together. You won’t need to spend hours kneading dough; instead, you’ll mix a few ingredients, let them mingle, and walk away. This hands-off approach means you can focus on other kitchen adventures—or simply kick back with a good book while the dough rises.
Flavor Explosion
The combination of roasted garlic and earthy rosemary creates a flavor profile that’s nothing short of divine. Each bite of this bread is bursting with savory goodness, making it a perfect companion for soups, salads, or simply slathered with butter. Trust me, one piece won’t be enough!
Perfect for Any Occasion
Whether you’re hosting a dinner party, preparing a family meal, or enjoying a quiet night in, this bread fits seamlessly into any setting. It’s impressive enough to wow your guests yet simple enough for a weeknight dinner. Plus, it makes for great leftovers—if you can resist devouring the whole loaf in one sitting!
Healthier Homemade Option
Making bread at home means you control the ingredients. This No-Knead Roasted Garlic Rosemary Bread is free from preservatives and packed with wholesome flavors. It’s a healthier alternative to store-bought varieties, ensuring you know exactly what’s going into your food. Your body—and your taste buds—will thank you!
Ingredients
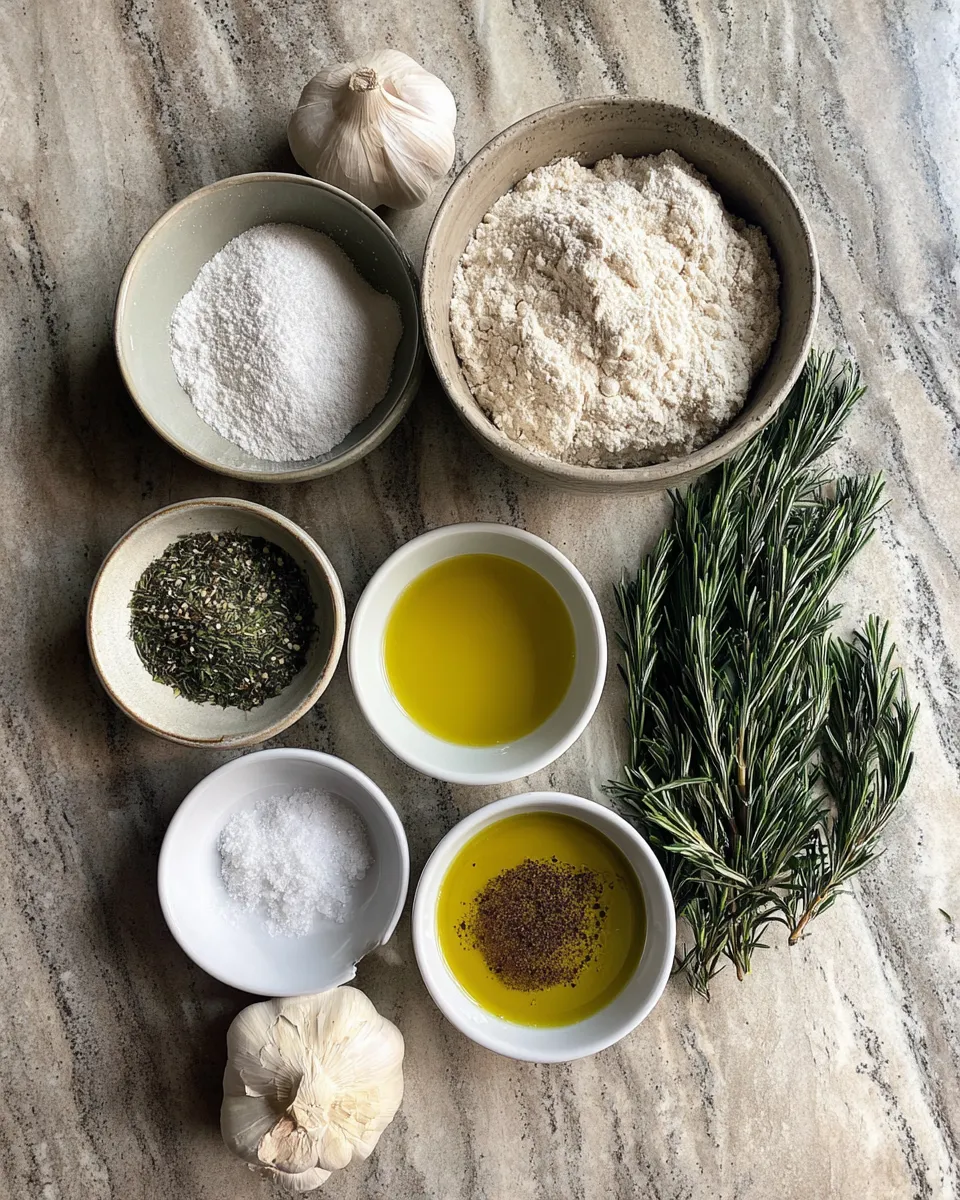
Here’s what you’ll need to create this delightful bread:
Full List of Ingredients
- 3 cups all-purpose flour
- 1 ½ teaspoons salt
- ½ teaspoon instant yeast
- 1 ½ cups warm water (about 110°F)
- 1 head of garlic
- 2 tablespoons fresh rosemary, chopped
- Olive oil, for drizzling
Step-by-Step Instructions
Step 1: Roast the Garlic
Preheat your oven to 400°F. Take the head of garlic and slice off the top, exposing the individual cloves. Drizzle a bit of olive oil over the exposed cloves and wrap the garlic in aluminum foil. Roast it in the oven for about 30-35 minutes until the cloves are soft and golden. The aroma will fill your kitchen, making it hard to wait! Once done, let it cool slightly before squeezing the roasted garlic into a bowl. This will be the flavorful base for your bread.
Step 2: Mix the Dry Ingredients
In a large mixing bowl, combine 3 cups of all-purpose flour, 1 ½ teaspoons of salt, and ½ teaspoon of instant yeast. Use a whisk to blend the ingredients evenly. This step is crucial as it ensures that the yeast is evenly distributed throughout the flour, leading to a more consistent rise. Take a moment to appreciate the earthy smell of the flour and salt—such a comforting combination!
Step 3: Add Wet Ingredients
After mixing the dry ingredients, pour in 1 ½ cups of warm water and the roasted garlic you prepared earlier. Stir everything together with a wooden spoon or spatula until no dry flour remains. The mixture will be quite sticky; don’t worry, that’s what we want! This is a no-knead recipe, so the dough will develop gluten as it rests. Cover the bowl with plastic wrap or a clean kitchen towel, and let it sit at room temperature for 12-18 hours. This long resting period is what gives the bread its incredible flavor and texture.
Step 4: Add Fresh Rosemary
Once your dough has risen and developed bubbles on the surface, it’s time to incorporate the fresh rosemary. Gently fold in 2 tablespoons of chopped rosemary using a spatula. This step adds a fragrant touch to the bread, enhancing the overall flavor. Remember, be gentle! You don’t want to deflate the dough too much. Once the rosemary is mixed in, cover the bowl again and let it rest for an additional hour.
Step 5: Shape the Dough
After the second resting period, lightly flour your work surface. Turn the dough out onto the surface, using a spatula to scrape it gently from the bowl. With floured hands, fold the dough over itself a few times to shape it into a loose ball. Don’t worry if it’s a bit sticky; that’s perfectly fine! Place the dough seam-side down on a floured piece of parchment paper. Cover it with a towel and let it rest for another 30 minutes. This extra time will help the dough relax and make it easier to shape.
Step 6: Preheat Your Oven
About 20 minutes before your dough finishes resting, preheat your oven to 450°F. Place a Dutch oven (or any heavy pot with a lid) inside the oven while it heats. This method creates a steamy environment for the bread to bake, resulting in a crispy crust and soft interior. Be careful when handling the hot pot—safety first!
Step 7: Bake the Bread
Once the oven is hot and your dough has rested, carefully remove the Dutch oven. Lift the parchment paper with the dough and gently place it into the pot (the parchment paper makes this easier and ensures your bread doesn’t stick). Drizzle a tiny bit of olive oil on top of the dough for added flavor and a golden crust. Cover the pot with its lid and bake for 30 minutes. The smell will be heavenly!
Step 8: Uncover and Finish Baking
After 30 minutes, remove the lid to allow the bread to brown. Bake for an additional 15-20 minutes, or until the crust is deep golden brown. When it’s done, the bread should sound hollow when tapped on the bottom. This step is essential for achieving that perfect crust—just like the ones you’d find in a bakery!
Step 9: Cool and Enjoy
Carefully remove the bread from the pot using the parchment paper and let it cool on a wire rack for at least 30 minutes before slicing. This cooling period allows the steam to escape, preventing the bread from becoming gummy inside. Trust me, the wait will be worth it! Slice into your beautiful loaf and enjoy the fruits of your labor, preferably with a generous spread of butter or your favorite dip.
What to Serve with This Recipe
Suggested Pairings
This No-Knead Roasted Garlic Rosemary Bread pairs beautifully with many dishes. Here are a few suggestions:
- Rich, creamy soups like potato leek or tomato basil
- Fresh salads drizzled with balsamic vinaigrette
- Charcuterie boards featuring cheeses, olives, and cured meats
- As a side to hearty stews or casseroles
Variations and Substitutions
Herb Variations
If rosemary isn’t your favorite, feel free to experiment with other herbs! Thyme, oregano, or even sage can provide a unique twist to this bread. Just remember to chop them finely and mix them in with the garlic.
Cheesy Delight
For a cheesy version, fold in 1 cup of shredded cheese, like mozzarella or cheddar, just before baking. This will create a gooey, cheesy interior that’s absolutely irresistible. Who can resist cheese?
Whole Wheat Option
If you’re looking for a healthier option, you can substitute half of the all-purpose flour with whole wheat flour. This will give the bread a nuttier flavor and a denser texture while still keeping it delicious!
Gluten-Free Adaptation
For those with gluten sensitivities, you can try using a gluten-free all-purpose flour blend. Just be sure it contains xanthan gum for the best texture. The flavor will still shine through, making it a delightful alternative!
Storage Instructions
Room Temperature
Store any leftover bread in a paper bag at room temperature for up to 3 days. This helps maintain the crust’s crispiness. Avoid plastic bags as they can make the bread soggy.
Freezing for Later
If you want to save some for later, wrap the cooled bread tightly in plastic wrap and aluminum foil, then freeze for up to 3 months. When you’re ready to enjoy it, thaw it at room temperature and warm it in the oven for a few minutes to revive that fresh-baked taste.
Recipe Tips and Tricks
Related Recipes
If you loved this No-Knead Roasted Garlic Rosemary Bread, you might also enjoy:
Print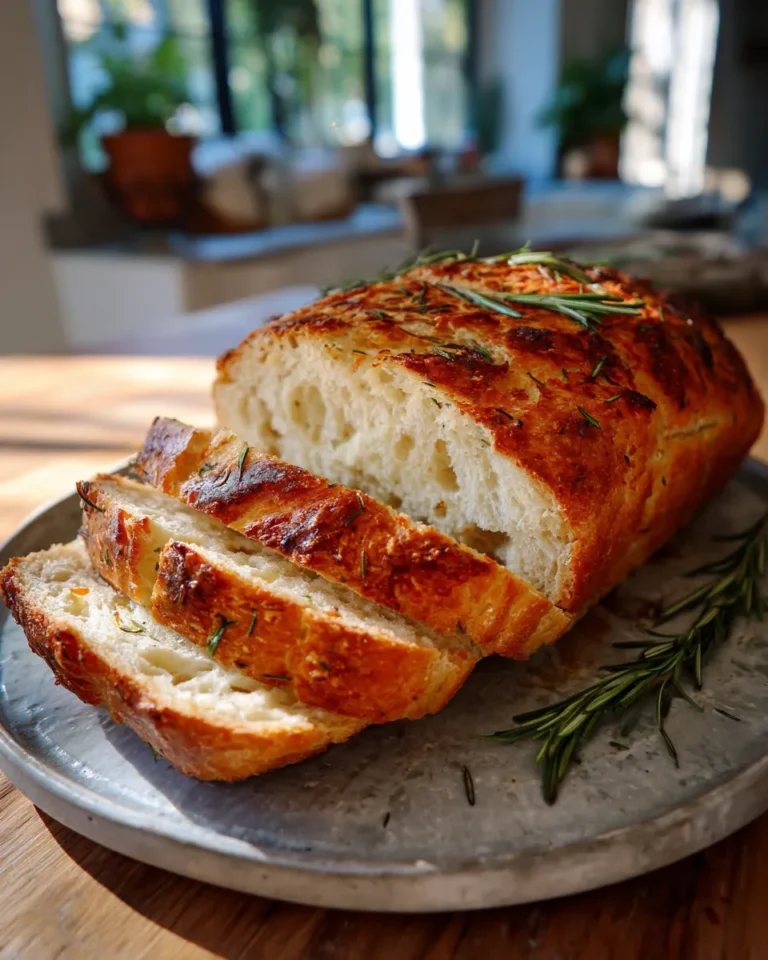
Irresistible No-Knead Roasted Garlic Rosemary Bread
This rustic bread features roasted garlic and fresh rosemary, perfect for dipping or as a side.
- Total Time: 13-19 hours
- Yield: 1 loaf 1x
Ingredients
- 3 cups all-purpose flour
- 1 ½ teaspoons salt
- ½ teaspoon instant yeast
- 1 ½ cups warm water (about 110°F)
- 1 head of garlic
- 2 tablespoons fresh rosemary, chopped
- Olive oil, for drizzling
Instructions
- Roast the garlic at 400°F for 30-35 minutes, then let cool and squeeze into a bowl.
- Mix flour, salt, and yeast in a bowl.
- Add warm water and roasted garlic, stirring until no dry flour remains. Cover and rest for 12-18 hours.
- Fold in chopped rosemary gently and rest for another hour.
- Shape the dough into a ball and let rest for 30 minutes.
- Preheat oven to 450°F with a Dutch oven inside.
- Transfer dough to the hot pot, drizzle with olive oil, cover, and bake for 30 minutes.
- Remove lid and bake for an additional 15-20 minutes until golden brown.
- Cool on a wire rack for 30 minutes before slicing.
Notes
- For best flavor, allow the dough to rest for the full time.
- Serve with butter or your favorite dip.
- Prep Time: 12-18 hours (including resting)
- Cook Time: 45-55 minutes
- Category: Bread
- Method: Baking
- Cuisine: American
- Diet: Vegetarian
Nutrition
- Serving Size: 1 slice
- Calories: 150
- Sugar: 0g
- Sodium: 200mg
- Fat: 1g
- Saturated Fat: 0g
- Unsaturated Fat: 1g
- Trans Fat: 0g
- Carbohydrates: 30g
- Fiber: 1g
- Protein: 4g
- Cholesterol: 0mg
Keywords: rustic bread, garlic bread, rosemary bread, homemade bread
FAQs
Can I use regular garlic instead of roasted garlic?
You can use raw garlic, but roasting it adds a sweet, mellow flavor that elevates the bread. If you choose to use raw garlic, consider using less to avoid overpowering the bread.
What if my dough doesn’t rise?
If your dough doesn’t rise, check the freshness of your yeast. Instant yeast should be active and bubbly when mixed with warm water. If it’s not, it might be time to buy a new batch!
Can I make this bread in a bread machine?
While this recipe is designed for traditional baking, you can adapt it for a bread machine by using the dough setting. Just follow the same ingredient ratios and let the machine do the mixing and initial rise.
How do I know when the bread is done baking?
The bread is done when it’s golden brown and sounds hollow when tapped on the bottom. An internal temperature of around 200°F is a good indicator that it’s fully baked.
What can I do with leftover bread?
Leftover bread can be used for croutons, bread pudding, or simply toasted for breakfast. It’s versatile, so get creative with it!
Conclusion
Baking your own No-Knead Roasted Garlic Rosemary Bread at home is a delightful experience that fills your kitchen with warmth and delicious smells. This recipe is a perfect example of how easy it can be to create something truly special with simple ingredients. I hope you find joy in baking this bread as much as I do. Remember, cooking is all about love and laughter, so gather your ingredients, roll up your sleeves, and make some memories in the kitchen. Happy baking!