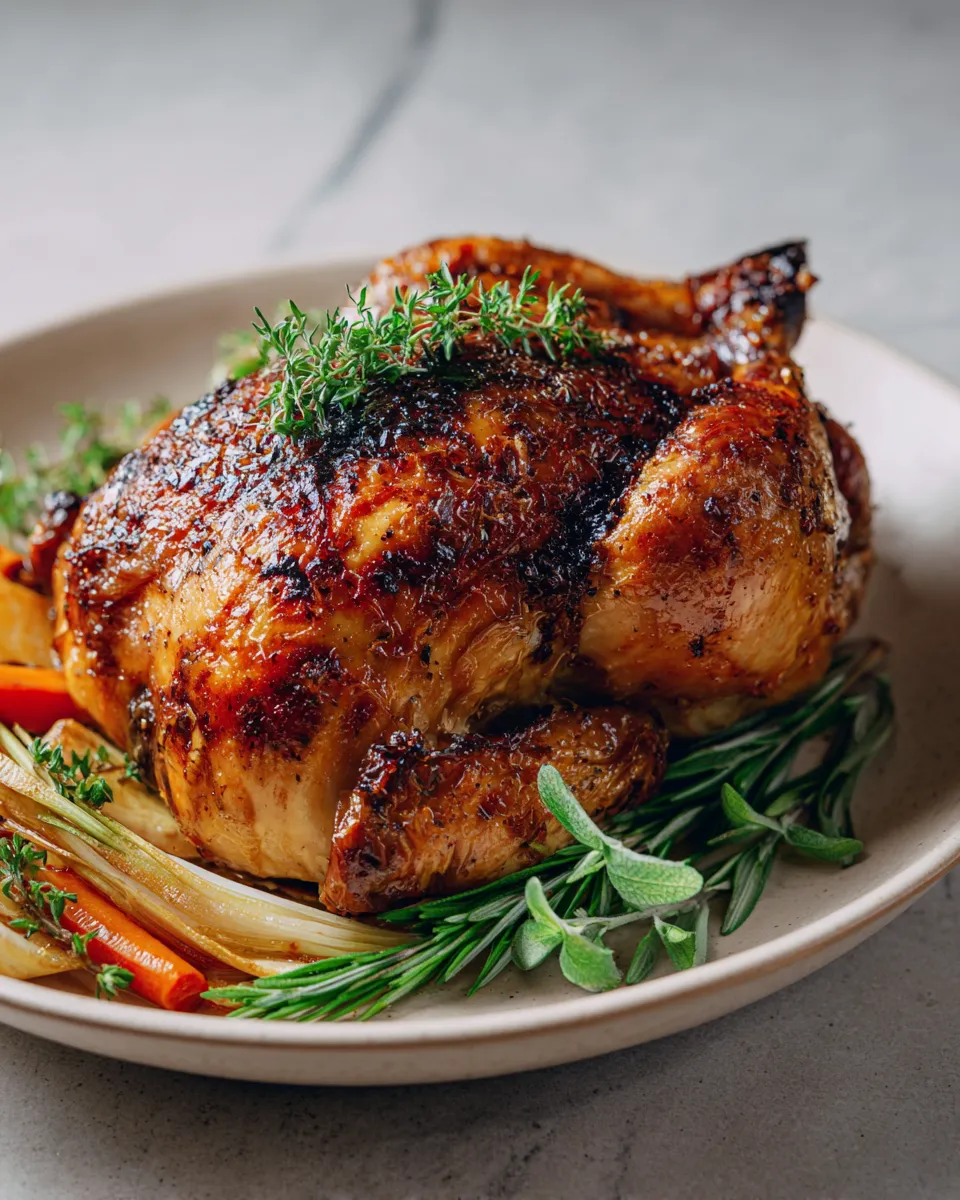
Deliciously Juicy Cider Brined Roast Chicken Recipe
Welcome to my kitchen! Today, I’m excited to share a recipe that brings back memories of cozy family dinners and the delightful aroma that fills the air when a roast is cooking. Cider brined roast chicken is not just a meal; it’s an experience that can transform an ordinary evening into something special. Imagine the juicy, tender chicken, infused with the sweet and slightly tangy notes of apple cider, creating a flavor explosion with every bite. This recipe is a perfect way to celebrate the changing seasons and the delicious harvest of apples, connecting us to the warmth of home and family.
There’s something magical about cooking a whole chicken. It’s not just about the food; it’s about the gathering. Whether you’re hosting friends for a weekend dinner or cooking for a casual family night, a perfectly roasted chicken can be the star of the table. Plus, the process of brining adds a layer of flavor and tenderness that makes all the difference. So, let’s roll up our sleeves and dive into this delightful cider brined roast chicken recipe that’s sure to impress your guests and warm your heart!
Why You’ll Love This Recipe
Juicy and Flavorful
This cider brined roast chicken is incredibly juicy. The brining process allows the chicken to soak up all the flavors from the cider, herbs, and spices. As it roasts, the skin becomes crispy while the meat remains tender and succulent. Every bite is packed with flavor, making it a dish everyone will rave about!
Simple Ingredients
You won’t need any fancy ingredients or equipment for this recipe. The beauty of this dish lies in its simplicity. With just a few staples, including apple cider, garlic, and some fresh herbs, you can create a masterpiece. It’s a great way to use what you already have in your pantry and fridge.
Perfect for Any Occasion
Whether it’s a festive holiday dinner, a weekend gathering, or a casual weeknight meal, this roast chicken fits the bill. It’s versatile enough to suit any occasion, and it will leave your guests asking for seconds. Plus, it pairs wonderfully with a variety of sides!
Leftover Friendly
One of the best things about making a whole roast chicken is the leftovers! You can use the extra meat in salads, sandwiches, or soups. Additionally, the bones can be used to make a rich, comforting broth. This recipe ensures you get the most out of your ingredients!
Ingredients
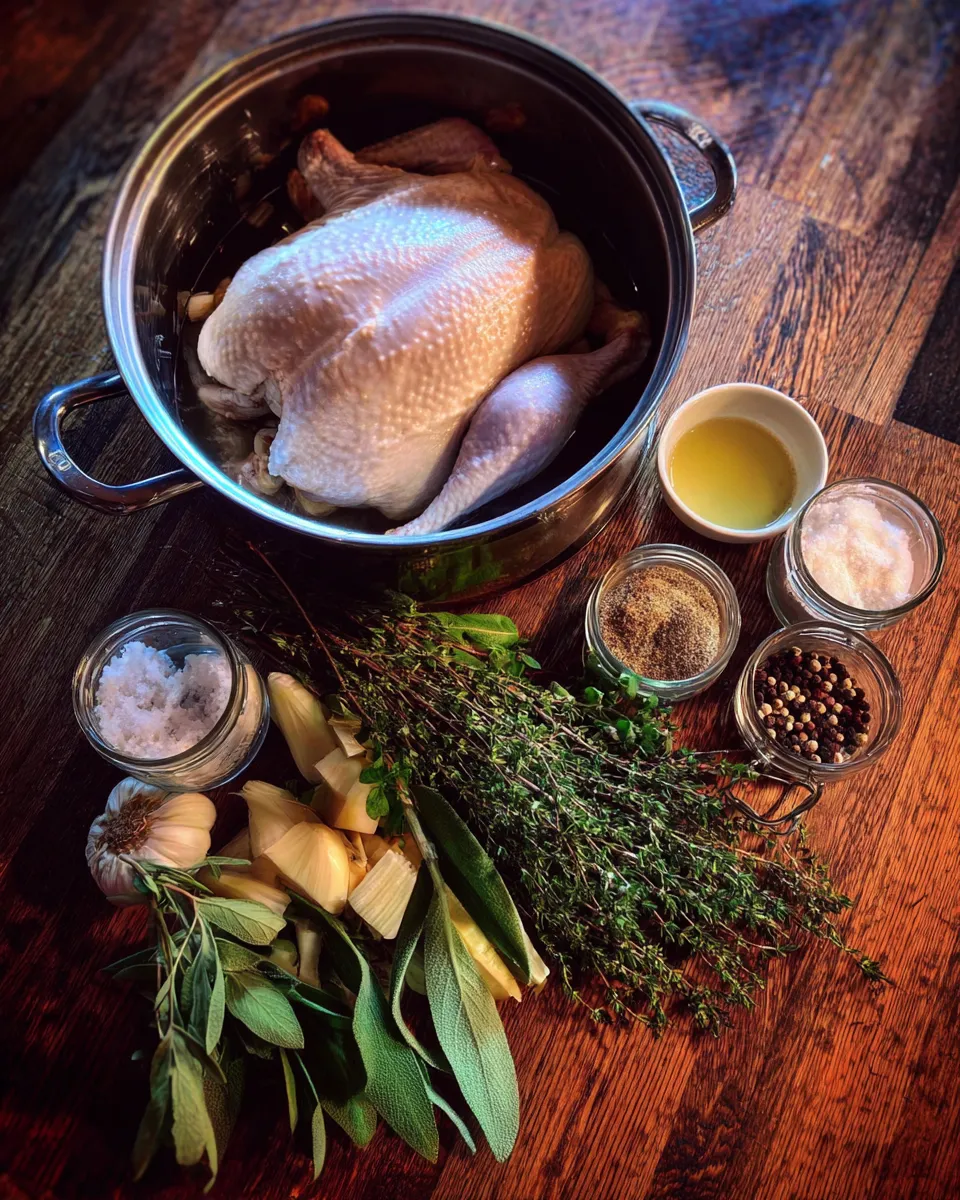
Gather your ingredients before we start cooking. Here’s what you’ll need to make this delicious cider brined roast chicken:
Full List of Ingredients
- 1 whole chicken (about 4-5 pounds)
- 4 cups apple cider
- ¼ cup kosher salt
- ¼ cup brown sugar
- 1 tablespoon black peppercorns
- 4 cloves garlic, smashed
- 2-3 sprigs fresh thyme
- 2-3 sprigs fresh rosemary
- 1 lemon, quartered
- 2 tablespoons olive oil
- Salt and pepper to taste
Step-by-Step Instructions
Step 1: Prepare the Brine
Start by making the brine. In a large pot, combine the apple cider, kosher salt, brown sugar, black peppercorns, smashed garlic, thyme, and rosemary. Heat the mixture over medium heat until the salt and sugar dissolve, stirring occasionally. This should take about 5-7 minutes. Once the brine is ready, remove it from the heat and let it cool completely. It’s crucial to let it cool so you don’t cook the chicken when you add it.
Step 2: Brining the Chicken
Once the brine has cooled, place your whole chicken in a large, resealable plastic bag or a clean bucket. Pour the cooled brine over the chicken, ensuring it’s fully submerged. If using a bag, seal it tightly, removing as much air as possible. If using a bucket, cover it with plastic wrap. Refrigerate for at least 8 hours, or overnight for maximum flavor. This step is essential as it infuses the chicken with moisture and flavor.
Step 3: Preheat the Oven
The next day, preheat your oven to 425°F (220°C). This high temperature will help achieve a crispy, golden skin while keeping the meat juicy. While waiting for the oven to heat, take the chicken out of the brine and rinse it under cold water to remove excess salt. Pat it dry with paper towels; this will help the skin crisp up nicely during roasting.
Step 4: Season the Chicken
Now it’s time to season your chicken. Rub the outside of the chicken with olive oil, then sprinkle generously with salt and pepper. Don’t forget to season the cavity too! Place the lemon quarters inside the cavity along with a few sprigs of thyme and rosemary for extra flavor. This step helps build layers of flavor that will enhance your roast.
Step 5: Roast the Chicken
Place the chicken breast-side up on a roasting pan or a cast-iron skillet. Insert it into your preheated oven and roast for about 1 hour and 15 minutes, or until the internal temperature reaches 165°F (74°C) when checked at the thickest part of the thigh. It’s okay to use a meat thermometer; it will ensure your chicken is perfectly cooked!
Step 6: Baste for Extra Juiciness
About halfway through the cooking time, consider basting your chicken with the juices that collect in the pan. This extra step will enhance the flavor and keep your chicken moist. Use a ladle or a spoon to gently pour the juices over the skin carefully. It should look golden and appetizing!
Step 7: Rest the Chicken
Once the chicken is done, remove it from the oven and let it rest for at least 15-20 minutes before carving. This resting period allows the juices to redistribute, ensuring that every slice is juicy and tender. It also gives you time to prepare any sides you want to serve with your roast chicken.
What to Serve with This Recipe
Suggested Pairings
This cider brined roast chicken pairs beautifully with a variety of sides. Here are some suggestions:
- Garlic mashed potatoes
- Honey-glazed carrots
- Roasted Brussels sprouts
- Fresh green salad with vinaigrette
- Apple crisp for dessert
Variations and Substitutions
Herb Variations
If you want to switch up the flavors, feel free to use different herbs! Sage, oregano, or even a bit of dill can add a unique twist to your brine. Experimenting with herbs can lead to delightful surprises.
Citrus Brine
For a citrusy zing, replace the apple cider with orange juice or a combination of citrus juices. This variation gives the chicken a fresh, vibrant flavor that’s perfect for summer gatherings!
Spicy Kick
If you enjoy a little heat, add some crushed red pepper flakes to the brine. It will bring a lovely warmth to the dish without overpowering the sweetness of the cider.
Vegetarian Option
For a vegetarian alternative, you can use the brine to marinate a whole cauliflower. Roast it in the same manner as the chicken, and you’ll have a stunning centerpiece for a plant-based meal!
Storage Instructions
Refrigeration
If you have leftovers (which is unlikely, but let’s be optimistic!), store them in an airtight container in the refrigerator for up to 3-4 days. Enjoy them in salads, sandwiches, or simply reheated.
Freezing
You can also freeze leftover cooked chicken. Wrap it tightly in plastic wrap and then in foil, or store it in a freezer-safe container. It can be frozen for up to 3 months. Thaw it in the fridge before reheating to preserve its texture.
Recipe Tips and Tricks
Related Recipes
If you enjoyed this cider brined roast chicken, you might also love these comforting recipes:
- Herb Roast Turkey
- Garlic Butter Chicken Thighs
- Maple Glazed Pork Tenderloin
- Stuffed Bell Peppers

Deliciously Juicy Cider Brined Roast Chicken Recipe
This cider brined roast chicken is flavorful, juicy, and perfect for any occasion.
- Total Time: Overnight (including brining)
- Yield: 4-6 servings 1x
Ingredients
- 1 whole chicken (about 4–5 pounds)
- 4 cups apple cider
- ¼ cup kosher salt
- ¼ cup brown sugar
- 1 tablespoon black peppercorns
- 4 cloves garlic, smashed
- 2–3 sprigs fresh thyme
- 2–3 sprigs fresh rosemary
- 1 lemon, quartered
- 2 tablespoons olive oil
- Salt and pepper to taste
Instructions
- Make the brine by combining apple cider, kosher salt, brown sugar, black peppercorns, garlic, thyme, and rosemary in a pot. Heat until dissolved, then cool.
- Submerge the chicken in the cooled brine in a resealable bag or bucket. Refrigerate for at least 8 hours or overnight.
- Preheat the oven to 425°F (220°C). Rinse the chicken and pat it dry.
- Rub the chicken with olive oil and season with salt and pepper, adding lemon and herbs inside the cavity.
- Roast the chicken for about 1 hour and 15 minutes until the internal temperature reaches 165°F (74°C).
- Baste the chicken halfway through cooking with pan juices for added moisture.
- Let the chicken rest for 15-20 minutes before carving.
Notes
- For best results, brine the chicken overnight.
- Use a meat thermometer to ensure the chicken is cooked thoroughly.
- Prep Time: 15 minutes
- Cook Time: 1 hour 15 minutes
- Category: Main Course
- Method: Roasting
- Cuisine: American
- Diet: Gluten-Free
Nutrition
- Serving Size: 1 serving
- Calories: 450
- Sugar: 8g
- Sodium: 900mg
- Fat: 24g
- Saturated Fat: 6g
- Unsaturated Fat: 16g
- Trans Fat: 0g
- Carbohydrates: 10g
- Fiber: 0g
- Protein: 45g
- Cholesterol: 120mg
Keywords: cider brined roast chicken, roasted chicken, holiday chicken
FAQs
How long should I brine the chicken?
Brining for at least 8 hours is optimal, but overnight brining is best for maximum flavor.
Can I use a frozen chicken for this recipe?
Yes, but make sure to thaw it completely before brining. This will ensure even flavor distribution.
What if I don’t have apple cider?
You can substitute apple cider vinegar mixed with water or use another fruit juice like pear or cranberry for a different flavor profile.
Is it necessary to rinse the chicken after brining?
Yes, rinsing helps to remove excess salt, ensuring the chicken doesn’t become overly salty when roasted.
Can I cook this chicken on the grill?
Absolutely! You can grill the brined chicken for a smoky flavor. Just make sure to adjust the cooking time accordingly.
What’s the best way to know if the chicken is done?
The most accurate way is to use a meat thermometer. The internal temperature should reach 165°F (74°C).
Conclusion
Cooking is a journey filled with flavor, creativity, and love. This cider brined roast chicken embodies that spirit beautifully. I hope you find joy in making this dish as much as I do. Whether you’re a beginner or a seasoned cook, this recipe is designed to inspire confidence and creativity in the kitchen. So gather your ingredients, invite loved ones over, and let the magic unfold. Enjoy every bite, every laugh, and every moment around the table. Happy cooking!